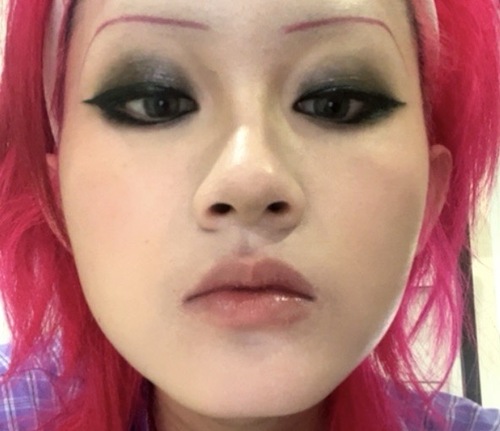
My Daily Makeup Look #1
I didn't really intend for this to be much of a “tutorial”. It's more like a memory note for myself. I originally wrote this because I'm super forgetful and my memory's a total bozo, but I ended up thinking ..wait this is kinda cool let me put it on my website.
This is a daily smoky eyes look that just works!! takes me about 30 minutes to do, but if I'm on shorter time I can skip some of the "optional" and clean-up process, that cut down the time to about 10 minutes. I also wear this to school wink wink.
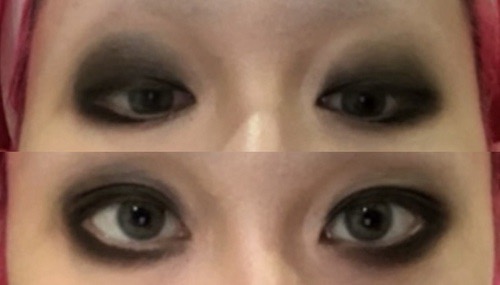
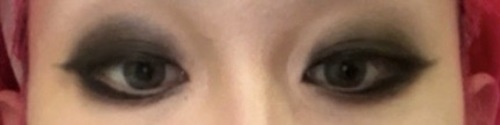
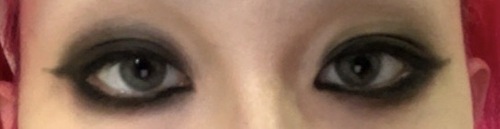
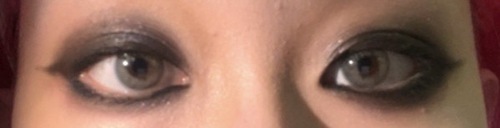
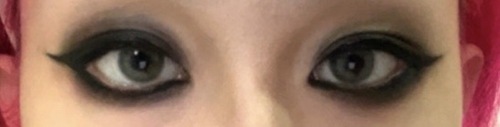
Here's what the makeup look like:

Base
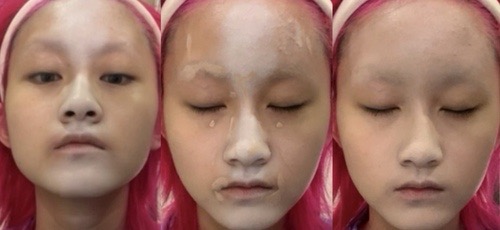
I start with white foundation, applied in a straight line across my face.
Then I go in with concealer to even out areas like my eyebrows, around the nose, and chin. I blend it all out using a dense circular brush. If I have time, I let the concealer sit for about 5 minutes before blending. it really helps with coverage :D
Contour
For contouring, I use a cool-toned liquid product in these places (see pic). Then blend it with a triangle brush.

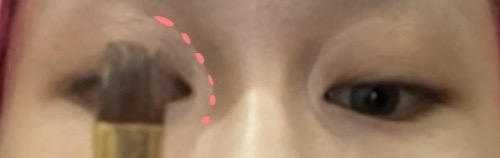
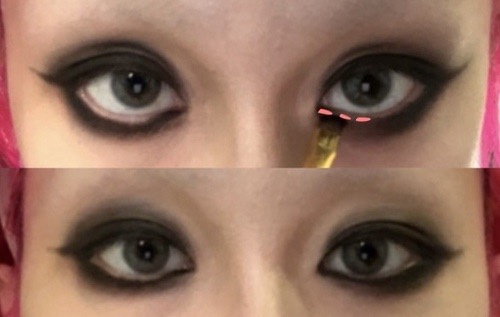
Next, I grab a flat brush and use concealer to carve out a C-shape around the outer corners of my eyes. I blend outward, but keep the edges sharp.
Then I use a dry, fluffy flat brush to apply a purple-red eyeshadow in a V shape on the bridge of my nose. I blend it out gently with my finger.
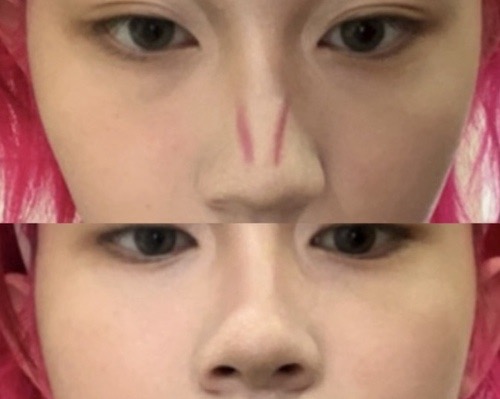
I clean up certain areas with concealer, such as the high nose bridge and around nostrils
Eyeshadow
Sometimes I'd do eyebrows first, it depends on my mood to be honest.
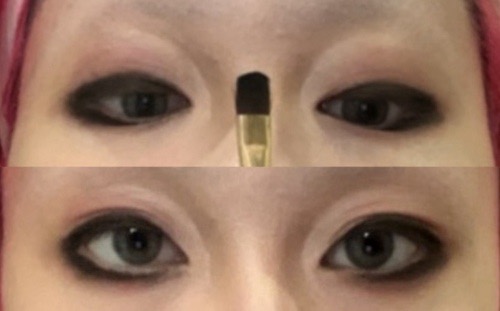
For the base shadow, I use that same purple-red shade and apply it with a super fluffy brush. Because of my eye shape, I bring the color up high so it stays visible when my eyes are open. I also apply it on the lower lash line.

Next, I use a flatter, rounded brush to apply black shadow all over the lid, blending it out into the red. I do the same on the lower lash line but avoid the waterline so my eyes don't look smaller.
This part takes some time—just keep blending until it's smooth. No harsh lines.
Optional: Add a little wing with the same eyeshadow for a more feminine style.
Use a very small flat brush to go in the waterline, but only in the inner corner (close to the tear duct). This part is very important as it'll instantly elevates the whole look.
Tightline upper lid with pencil liner, and also hit the inner corner to lock it in. It's a subtle detail but makes a big difference.
Optional: Add some glitter. I use a very dark purpleish eyeshadow glitter.
Finally, I use liquid eyeliner to sharpen everything up and ensure it'll look good on flash and photos. Follow the little wing you draw and just the darkest part.
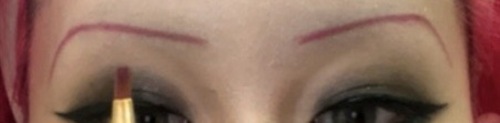
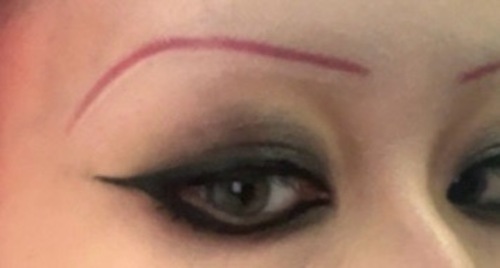
Eyebrows
My brows are shaved and I draw them on from scratch, if you have eyebrows you could just skip this and do your usual eyebrows routine.
Optional: Sketching the shape with a light brown eyebrows pencil first. Helps guide the final shape and makes it easier for the next step.

Then I take an angled brush and dipped it in pink eyeshadow, fill in over the draft (or just draw them on if I have no time for the draft). I like when my brows match my hair (normally when I have black hair I use black eyeshadow), but use any color that works for you.
If I'm feeling extra I'll clean them up with concealer to make the edge super sharp.
Touch Ups
I use a big, round foundation brush (but I use it for blush) and apply the same purple-red eyeshadow to the high points of my cheeks near the eyes. I also dab a little on my nose.
For lips, I use IN2IT Moisture Bomb in the shade Mulberry. I slightly overline so that my lips look bigger, then blur the edges with my finger.
Finally, I set everything with pressed powder to keep everything in place and get a matte finished. Especially the eyebrows making sure it won't budge!!!
Extras
If I really want to go all out, I'll also add:
- Fake lashes. SUUper extra but I always look so much better with it.
- Fake freckles with a pointy brush and brown eyeshadow alternate with orange.
- Draw on bottom lashes with liquid eyeliner.
And that's the full breakdown.. This look is super customizable, so tweak it however you want. Let me know (via @contacts or Guestbook) if you try it out or if you have questions about any step!!!